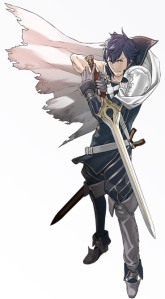
Newcomer: Chrom


Chrom from Fire Emblem: Kakusei

Chrom

Universe: Fire Emblem

Debut: Fire Emblem: Kakusei

Element Alignment: Wind

Affinity: Good

Reasons for Fighting: Conviction

Availability: Starter

Chrom is the prince of the Holy Kingdom of Iris and is the younger brother of the ruling queen, Emelina. He is the descendent of the legenmdary Hero King and bears the mark of Naga. He heads the vigilante force that patrols the borders of Iris and Perezia after a series of suspicious behaviors from Perezia. He has a deep conviction in his chosen path and believes a leader must show his strength as to be an inspiration to others.


Chrom`s Stats

Power: ***
Weight: ***
Defense: **
Speed: ****
Jump: ***
Recovery: **
Element: ***

Chrom is fairly balanced in all his abilities. His most strongest is his speed and jump ability and is fairly good at defense and power. He is of average weight for a sword fighter. However, he has fairly long reach due to his added bonus of creating a vacuum type effect whenever he strikes. When he attacks, players that within a body length away are slightly sucked into his attack. This allows Chrome to pull opponents into his area of attack. This can be both advantageous as well as as a disavantage depending on the situation.

Chrome is fairly strong in his Wind element since he can bring opponents into him through vacuum. However, his recovery Special Up B move isn`t that strong and doesn`t allow Chrome enough height. This can be counter-balanced by some of his other attacks that allows him to stall in the air for some time.


Chrom’s Special B Move Set

  • Neutral B – Thrust
  • Side B – Blade Gale
  • Up B – Ascending Sword
  • Down B – Ground Blade

The Final Trio

  • Final Smash – Sword Rain
  • Final Melee – Mirage Sword
  • Final Brawl – Emblem Strike

Descriptions

Thrust is Chrom`s Neutral B attack. Chrom thrusts his sword forward and pierces the opponent. It cannot be charged but it has a far reach. Additionally, because the attack has a vacuum effect, it can pull opponents into the latter animations of the attack. If done in the air, it can temporarily stall Chrom in the air. It does 12-17% Wind damage if hit fully but does 5-10% Wind damage if vacuumed in after the attack. It has a quick start up and ending animations so it is easy to execute.

Blade Gale is Chrom`s Side B move. Chrom propels himself forward and unleashes a series of sword attacks. It has incredible reach and can easily be used as a recovery move. The attack also sucks opponents into the attack. It is capable of doing 8 hits at 2% Wind damage each hit thus it is capable of doing 16% Wind damage fully. It also has high priority and can cancel weaker projectiles. When doe sin midair, Chrom can either do a second jump or go into his UP B recovery move.

Ascending Sword is Chrom`s Up B Special Recovery move. Chrom leaps up into the air in a spiraling screw attack. It has the highest vacuum affect and can pull farther away opponents into the attack. However, it only goes straight up and when done, Chrom goes into a helpless state. It can do up to 20% Wind damage if hit fully or 15% Wind damage if it is halved. It has slow ending lag however. It is a decent reovery move but it is best to use it with Blade Gale.

Ground Blade is Chrom`s Special Down B move. This is his only projectile. Chrom slices the ground and a energy wave erupts from it. It can be charged to increase the waves length but, despite that, it doesn`t travel very far. It will only shoot out in front of Chrom if un-charged. However, charging it doe snot affect the power of the attack. It does 13% Wind damage regardless if charged or uncharged. It can be done it the air but it angles slightly downwards when released. It has medium priority and it can be cancelled by stronger attacks or projectiles. However, it is fast and can easily be used to throw off opponents that wander too close to Chrom.

Sword Rain is Chrom`s Final Smash. Chrome points his sword to the sky and from it, swords made out of magical start piercing the stage. The don`t go through the stage like PK Starstorm but become lodged into the stages platforms. Each sword does around 3% damage and anywhere from 30-40 swords will rain onto the stage within 12 seconds. It has a wide enough radius that medium to small stages are covered entirely in the attack. It can drain shields as well and incredibly hard to escape/dodge. Altogether, it can do between 90-120% damage however it does very little knock back from the swords.

  • Beginning Cinematic: Chrom points his sword torwards the sky and a light shoots down and strikes his sword.

Mirage Sword is Chrom`s Final Melee. A copy of Chrom appears from his sword and two begin striking/attacking the opponent. The copy appears opposite of the player and faces the platyer as wellb as it is far enough to corner a opponent. It copies the attacks of Chrom but obiviously facing Chrom. Chrom or the shadow is unable to be attacked. This doubles each damage by the attack. The effect lasts for 8 seconds.

  • Beginning Cinematic: Chrom brings his palm along the blade and, from it, magic expels off from it and creates a copy image.

Emblem Strike is Chrom`s Final Brawl. Chrom`s sword becomes engulfed in magic and he rushes forward with blinding speed. He strikes the opponent with one attack, then a second, and finally a third. He then flips over the opponent and strikes them down hard with his sword. He then slams his swor dinto the ground and a magical circle appears on the opponent. It then explodes in a vacuum like explosion. It does 75-80% Wind damage and high knock back.


Home Stage: Castle Crimea

Proposed Taunts

  • Up – Chrom slashes his sword down and says “Come at me!”
  • Right Side – Chrom sheathes his sword and draws it back out again.
  • Left Side – Chrom points his sword straight out and then slashes down.
  • Down – Chrom stands up straight and scratches the back of his head.

Proposed Winning Poses

  • Chrom sheathes his sword and dusts off his hands.
  • Chrom points his sword straight at the camera and says “No yet.”
  • Chrom stabs his sword into the ground and crosses his arms.

Proposed Stage Entrance

  • Chrom appears via a magical purple circle. He flips out of it; sword in hand.

Fighting Stance

  • Sword held straight forward like a fencing pose but more faster paced.

Proposed Idle Poses

  • Chrom flips the sword around in his hand.

Audience Cheer

  • CHROM! CHROM!! FIGHT ON, CHROM!

Kirby Hat

  • Chrom’s hair.

Proposed Palette Swaps

  • Indigo Chrom
  • Red Chrom
  • green Chrom
  • Blue Chrom
  • Blood Chrom

Proposed DLC Costumes

Lucia (from Fire Emblem: Kakusei)

Fredrick (from Fire Emblem: Kakusei)


Chrom’s Proposed Move Set

Ground Attack

Normal
  • Neutral Attack – Swings downward and then upward by pressing A again. Very quick but does below average damage. It does around 2% each hit. However, it can be chained continuously by pressing B after the second hit. It can juggle players but it has low priority and can be canceled out by other attacks.
  • Dash Attack – A dashing forward thrust. It can vacuum in opponents at the point of the sword. It is a fairly far reaching attack and does around 8% damage. However it has a slow ending lag.
  • Side Tilt – A quick sword poke that smacks the opponent on the head. Chrom also moves forward slightly during the attack. It does 11% damage and is very quick in both start up and ending.
  • Up Tilt – Swings his sword down to up in a wide cutting slash. It does around 12% damage and can vacuum opponents within a wide range. However, it has a fairly long ending lag.
  • Down Tilt – A downward aimed slice that can cause opponents to trip or fall down. It can vacuum smaller opponents or opponents on the ground. It does around 8% damage and is a very quick attack. However, the attack itself doesn’t have too much range and has a small window to do damage.
Smash
  • Side Smash – Steps forward and does a strong horizontal slash. It has very quick start up but Chrom steps backwards after the attack thus causes some ending lag. It has a long range of attack and a strong/long vacuum effect. It does between 16-18% damage and does good knock back.
  • Up Smash – Does three upward thrusts one right after another. The thrusts are fast but the move suffers from both start up and ending lag. Despite this, it is a great guarding attack and has high priority. During his middle animation, Chrom possesses super armor. Each thrust does 5-8% damage 15-24% damage. It does the highest amount amount of knockback at the last attack. It can cancel out attacks like Link’s Dair or Zero Suit Samus’ Dair.
  • Down Smash – Cuts forward to his right and then slightly crouches downward and cuts to his left and then fully crouches and cuts again to his right. Each cut does 6-9% damage and can do 18-27% damage but it hits less favorably than his Up Smash. As well, it is a slower attack that can be punished as he turns. However, it’s fairly unpredictable and each slash offers Hugh knockvack. As well, it can do crowd control in group battles.
Other
  • Ledge Attack – Flips onto the stage and kicks twice. One kick that does 3% damage while the second does 5%.
  • 100% Ledge Attack – Chrom climbs up and stabs forward with his sword. It does around 13% damage and has a far reach.
  • Floor Attack (Face up) – Quick stab to the left followed by horizontal slash to the right. 6% base and tip.

Aerial Attacks

  • Neutral Aerial – A forward vertical slash. It does 13% damage and vacuum opponents close by. It can do a meteor strike if hit exactly on the tip of the blade. It has a fairly good reach but it is too quick to pin point the tip of the sword.
  • Forward Aerial – A downward slash that momentarily pushes Chrom forward in mid air. It has a good distance and can confuse opponents because of it’s “boost of speed”. It does 12% damage and good knock back.
  • Back Aerial – Chrom turns backwards and kicks with both feet. It doesn’t have a vacuum effect but it deals 13% damage. It also doesn’t have very good reach but it is capable of dealing a lot of knock back.
  • Up Aerial – Chrom swings his sword like a wand above him. It can do two hits at 6% damage each. It doesn’t have good range upwards but it can hit opponents from both sides. It deals good knock back but it has a slow start up.
  • Down Aerial – Chrom turns down and dives downward at a diagonal slant. Chrom moves very fast but the attack can cause Chrom to kill himself if done in mid-air. However, it can be used to grab onto a ledge since Chrom moves at a diagonal slant. It does 15% damage and can spike players downwards as low as 3o%. It is an excellent kill move unless Chrom misses. It also has horrible ending lag when Chrom lands.

Grabs & Throws

  • Pummel – Elbows the opponent. A slower pummel. Does 2%.
  • Forward Throw – Chrom pushes the opponent and then kicks them in the gut. It is a quick throw but doesn’t have the best knock back. It does around 6% damage.
  • Down Throw – Knocks the opponent down, leaps on top, and stabs the opponent. Very gruesome. It does around 10% damage but virtually no knockback. It is best for causing damage.
  • Back Throw – Swings the opponent behind him and punches the opponent with his sword hilt. Does 9% damage and can KO as low was 130%.
  • Up Throw – Swings the opponent in two full circles before releasing them upward. It does 5% damage and is a rather slow throw. However, swinging the opponent can damage players around him.

My Thoughts

In my roster, Chrom replaced Lyndis because I felt Chrom is the better choice. While Lyndis does have the popularity and history, Chrom is the newest character to appear in a Fire Emblem game. As in SSBM and SSBB, they always add a Fire Emblem character that recently appeared in a game (Roy and Ike). In SSB4, Chrom would he that character.

I want Chrom to be a quick but powerful fighter that excels in both ground and aerial combat. I actually gave him attributes from both Marth and Ike.


Arguments for Chrom

  1. Chrom recently appeared in a Fire Emblem 3DS game. Looking at history, Sakurai has always given a slot to a new Fire Emblem character.
  2. Chrom can be a balance of Marth and Ike.
  3. Good moveset and story potential.
  4. A prince and a lord.
  5. A descendent of Marth.

Chances of being in SSB4

60% – Given Chrom’s recent game, I think he has a good enough chance of being in SSB4. Assuming Ike is in the game, he has competition from characters like Roy, Lyn, Michaiah, and The Black Knight. However, without Ike, I would say he has a very high chance unless a new Fire Emblem game is released before SSB4.
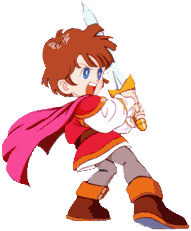
Newcomer: Prince Sable


Name: Prince Sable

Universe: Kaeru no Tame ni Kane wa Naru (For the Frog the Bell Tolls)

Debut: Kaeru no Tame ni Kane wa Naru (1992)

Element Alignment: Light

Affinity: Good

Reasons for Fighting: Rivalry

Availability: Starter

Prince Sable is the prince of the Sable King in the game Kaeru no Tame ni Kane wa Naru (For the Frog the Bell Tolls). While slightly naive and untested in the troubles of the world, Prince Sable is an energetic and positive hero that fights for the honorable cause. He is tasked with rescueing the PrincessTiramisu from the evil clutches of King Delarin. However, before he can set off, his long time rival Prince Richard sets off before him and makes a considerable head start. Prince Sable is left exploring the world and recieves two strange and unique powers: being able to transform into a frog and snake in certain conditions.


Prince Sable`s Stats

Power: **

Weight: **

Defense: ***

Speed: ****

Jump: ***

Recovery: ***

Element: ****

Prince Sable is a fairly avergae fighter with quick strikes that, while lack power, are fast and easily landed. Prince Sable, due to his size, is fairly hard to hit but because of his light frame; he can be KO`d easier. In fact, he is one of the lighter sword fighters in the game. He boasts a good jump and recovery and excels in his Light element abilities.

However, Prince Sable truly shines his ability to mix his transformations into his attacks. While Prince Sable can`t change into his frog or snake form on command, his attacks causes him to transform into them. This makes Prince Sable a truly unpredictable fighter.

In addition, Prince Sable can even cancel out of some of his attacks and retain that form for a few seconds. For example, Prince Sable`s down tilt transforms him into his Frog orm. However, during the middle of the attack animation, when th eplayer does a roll with Prince Sable, the Frog From rolls out of the attack.

Prince Sable`s Frog and Snake form a very hard to hit against due to their size. In addition, Prince Sable recieves a slightly higher defense and jumping stat while in Frog Mode while his Snake Form boasts a slight increase in power and speed. Meaning, Prince Sable`s Frog moves take more damage before flinching and, on ocassion, causes Prince Sable to jump higher. While Prince Sable`s Snake Form attacks allows him to strike a bit faster than usual and more powerful attacks compared to normal ones. Despite that, Prince Sable`s attacks are the most powerful when in his Human form. This prince is truly a hard one to predict.

Prince Sable`s Frog Form

Prince Sable`s Snake Form


Prince Sable`s Special B Move Set

  • Neutral B – Tussle
  • Side B – Frog Tougne
  • Up B – Magic Ring
  • Down B – Constrict

The Final Trio

  • Final Smash – Champion
  • Final Melee – Animal Parade
  • Final Brawl – The Frong Prince

Descriptions

Tussle is Prince Sable`s Neutral B Move. Prince Sable jumps forward in a upward diagonal leap. If he comes into contact with an opponent, a dust cloud appears over the players. Prince Sable then jumps out of the dust cloud while the opponent is spiked down. It can be a meteor smash but it is totally random. The damage recieved depends entirely on the amount of health each player has. If Prince Sable is at 0% but the opponent is at 40-80%, the opponent recieves 10-15% damage. However, if Prince Sable is 80-100% while the opponent is 0-50%, the opponent will reieve 15-25% damage. It depends entirely on the contrasting percentages. The higher Prince Sable`s HP and the lower the opponents Hp will cause the most damage.

It can also be used as a recovery move. If Prince Sable does a un-used double jump or Up recovery move in the middle of the animation, he can cancel out of the attack. However, if Prince Sable misses the ledge or runs tough the course of the B attack, he will fall into a helpless state. Prince Sable can wall jump though, even at the end of his animation in order to recover.

Frog Tougne is Prince Sable`s Side B move. Prince Sable quickly transforms into his Frog From and shoots out his frog tougne. If it hits the opponent strongly, it causes the opponent to be stuck to the tougne and forced into Prince Sable`s mouth. He is then chewn and spit out. However, if hit lightly, the attack just hits the opponent with a little knockback. When hit strongly, it does 18%, 8% fior the tougne and 10% for the chewing. If hit lightly, it only does 6%. It can also be used as a tether ability.

Magic Ring is Prince Sable`s Up B Recovery Move. Prince Sable jumps slightly up and, in mid air, a magical rune-like ring appears underneath him and propels him upwards. Prince Sable is helpless but as Super Armor during this portion of shooting upm loses the Super Armor during the arch of the attack, and then falls back to the ground. He loses his helpless state but can`t jump, double jump, or do his Up B move again. If the magical ring is formed on a opponent, it does 13% damage and moderate to high knock back.

Constrict is Prince Sable`s Special Down B move. Prince Sable quickly trransforms into his Snake Form. He then homes onto a opponent and, upon contact, begins to constrict the opponent. Press A will cause him to constrict harder. It has a large amount of hit-stun. It can do between 3-8 constrictions; depending on how much the opponent struggles. A normal constriction does 3% damage while the harder constriction does 5% damage. If done in midair, it causes the opponent to fall to the ground in a helpless state along with Prince Sable. When finished, the attack is a horrible ending lag so make sure Prince Sable is not open for attack.

Champion is Prince Sable`s Final Smash. Prince Sable rushes forward and begins slashing and peircing at the opponent. He attacks 7 times before, jumping back in which his Frog and Snake Froms appear as spirits next to him. He then slashes forward with three blades (belonging to each form). It does 60-68% Light damage and great horizontal knock back.]

  • Beginning Cinematic: Prince Sable clicks his fingers and the spirits of his Frog and Snake Form jump up from behind him.

Animal Parade is Prince Sable`s Final Melee. Prince Sable summons a horde of frogs and snakes in humanoid form. Wherever he walks, they follow and trample the opponents. Each hit does 2% damage and can hit up to 8 times before Prince Sable passes. However, if he jumps in the air, the frogs and snakes wait for him on the ground. They will rush to wherever Prince Sable landed. It doesn`t do much knock back at lower levels but deals higher as the opponents recieve more damage.

  • Beginning Cinematic: Prince Sable whistles and, from the sky, comes frogs and snakes. They crwod around him an dstart jumping up and down; cheering.

The Frog Prince is Prince Sable`s Final Brawl. Prince Sable graps his hands together and holds them aloft. A light shoots down and envelopes him. He transforms into a gigantic frog. The Gigantic Frog Form wraps his tougne around the opponent and eats him. The frog jumps up, spits the opponent to the ground, and then proceeds to land on him or ehr with devastating effect. It deals around 75-80% Light damage. Pribnce Sable then transforms back him his normal Human form.


Proposed Stage– Magical Forest

Proposed Taunts

  • Up – Prince Sable opens his coin bag and dumps coins onto the ground. They can be picked up and thrown for 1%.
  • Right Side – Prince Sable sheathes his sword, turns to face the camera, and puts his arms to his hips.
  • Left Side- Prince Sable turns around as his cape billows out and strikes a “cool pose”.
  • Down – Prince Sable faces the camera and does a peace sign. He then changes to the Frog and does a peace sign. He then changes into the snake and does a peace sign with his tongue. Finally, he changes back to human.

Proposed Winning Poses

  • Prince Sable pulls out his sword and stabs it up into the air. Light glints off from it as he poses.
  • He transforms into his Frog Form and hops around the area while ribbiting.
  • He transforms into his Snake Form and does a snake charmer impression while hissing.

Proposed Victory Theme

  • A whimsical fantasy fan-fare of the original victory theme.

Stage Entrance

  • Jumps down as a frog, changes into a snake, and then into his Human Form.

Fighting Stance

  • Keeps his legs spread apart with his sword held out in front of him. Resembles a traditional fencing pose.

Idle Poses

  • Prince Sable kicks the ground with his right foot.

Proposed Audience Cheer

  • PRINCE SABLE! PRINCE SABLE!

Proposed Kirby

  • Prince Sable’s hair and cloak.

Proposed Palette Swap

Proposed DLC Costumes

Prince Richard Costume


Prince Sable’s Proposed Move Set

Moveset

Ground Attacks

Normal
  • Neutral A – Prince Sable slashes his sword and then performs another slash. He then thrusts his sword like in fencing. Very quick with little lag. Does 2% damage each hit and 3% damage the last hit. Totals 7% damage altogether.
  • Dash Attack – A horizontal fencing thrust. Long reach but slow ending lag. Does 8% damage and decent knock back. It propels Prince Sable slightly forward.
  • Forward tilt – Transforms into a frog and does a head butt. Slow start up lag but powerful. Does 12% damage with vertical knock back. Good edge guarding technique since it can hit opponents on ledges.
  • Down tilt – Does a crouching fencing stab. throws opponents upwards. Does 8% damage.
  • Up tilt – Transforms into his Snake Form and stands on hishead and thrusts his tail upwards. Does 5% anywhere besides the point, does 8% at the point. Does high vertical knockback and can be juggled.
Smash
  • Forward Smash – Transforms into his Snake Form and jumps forward with his fangs barred. It sweetspooted, it does 15-20% damage with a 50/50% chance of poisoning the opponent. If not sweetspotted, does 13-17% damage with no chance to poison. Very good reach, quick, but slow ending lag.
  • Up Smash – Prince Sable thrusts his sword up and strikes with three quick stabbing hits. Does 22-27% damage sweetspotted, 18-21% damage not sweetspotted. Has a nice reach and can juggle opponents in the air. The last attack does the most knock back.
  • Down Smash – Transforms into his Frog Form and spins on the ground with his legs spread out. It does 5 hits and 3-4% damage each hit. It can do between 15-20% damage each hit. Has slow start up and ending lag but has decent knock back and can combo opponents.
Other
  • Ledge Attack – Jumps up and quickly transforms into the Snake From and crashes into the opponent. 6% damage.
  • 100% Ledge Attack – Slowly gets up andslashes upward diagonally. Does 9% damage.
  • Floor Attack – Kicks with his foot. Does 5% damage.

Aerial Attacks

  • Neutral aerial – Transforms into his Snake Form and thrusts his tail out like his fencing sword. Has slow start up and ending lag but very good reach. It hits for 10% damage but can be sweetspotted for 13% damage and high knock back. Can also poison opponents if sweetspotted.
  • Forward aerial – Transforms into his frog form and spins forward like a pinwheel. Does 12% damage and has high priority. Very little start up elg but a little ending lag. It can be shorthopped.
  • Back aerial – Kicks backwards behind him. A very quick and hgih priority attack. It can cancel projectiles. It can be short hopped. It does 9% damage.
  • Up aerial – Holds his sword vertical and slashes upwards and then brings his sword back down. It is fairly fast and deals Light based damage. It can do 14% damage. However, if short hopped, Prince Sable has horrible landing lag.
  • Down aerial – Transforms into his nake Form and crashes down with his mouth open. It does 13% damage, fast falling sped, and no ending lag. It can also poison opponent without sweetspotted but it has 10/100 chance of poisoning.

Grabs and Throws

  • Grab 1 – Transforms into Frog Form and grabs them with his tongue. (Far away from the opponent).
  • Grab 2 – Grabs the opponent. (Close to the opponent).
  • Pummel 1 – Chews them with his mouth. 2% damage.
  • Pummel 2 – Slaps them with the back of his hand. 3% damage.
  • Forward throw 1 – Spis them down into the ground and they bounce up. Does 6% damage and vertical knock back.
  • Forward Throw 2 – Lets go off them and then pierces them with his fencing sword. Does 8% damage.
  • Back throw 1 – Spits the opponent backwards and then kicks them. Does 8% damage.
  • Back Throw 2 – Swings the opponent around and kicks them away. Does 6% damage.
  • Down throw 1 – Jumps up slightly and spits them directly into the groubnd. Does a spike. 7% damage and good vertical knock back.
  • Down Throw 2 – Trips the opponent and slams them into the ground. Does 9% damage.
  • Up throw 1 – Spits the opponent upwards. High vertical knock back. Does 9% damage.
  • Up Throw 2 – Throws the opponent upwards and then slashes them with his sword. Does 12% damage and high knock back.

My Thoughts

I decided to add Prince Sable fairly late into my roster construction process. I wanted a fairly obscure, Japan-only Classical character such as Sukapon, Takamaru, or Alice but, despite that, I couldn`t decide who to add that would provide for a really unique and diverse move set. As I was browsing, I ran into a character I never heard of: Prince of Sable Kingdom or Prince Sable. Despite my history with Nintendo and it`s franchises, this character was cinpletely unknown to me as well as his game. So I did some research and found out how interesting he would be.

At first, I wanted Prince Sable to have a Down B transformation special but, since Zelda/Shiek and the Pokemon Trainer already has it, plus the Bowser Jr./Shadow Mario I made, I thought it would be overkill to have him change into a completely new character using Down B. I then thought of allowing him to transform into one of the two forms via Final Smash, Final Melee, or the Final Brawl but I couldn`t work that out. I then went to a taunt based transformation but, that was limited only on the ground, and, in my opinion, felt too clumsy.

So I decided to incorporate the transformations direcetly into his move set. The transformations are quick and, while make Prince Sable a bit slower, doesn`t mess up his game too much. I imagined the transformations would take a seoncd and a half to complete. Just POOF and a new form. What I had after was a pretty unique and interesting character that I felt would be a good addition to the SSB4 roster.


Arguements for Including Prince Sable

Here are some arguements for including Prince Sable and their strengths:

  1. Prince Sable is a Classical character.
  2. Prince Sable is a Japan-only character (which makes him possibly marketable to the Western audience).]
  3. He could go the route of Pit and have a new game in his series. The game series is fairly interesting and could have a childlike/humorous tone in a fantasy world.
  4. Therefore, he has a lot of potential.
  5. Three transformations: frog, snake, and human.
  6. A small sword fighter.
  7. Good story material (I see a EarthBound Rep and Prince Sable partnership!)
  8. Unique move set that can incorporate his transformations
  9. Has appeared in numerous SSB4 roster leaks. Some of which are said to be official.

Chances of Being in SSB4

30% – I would say Prince Sable, of all the classical characters, has the best chance to be in SSB4. Early leaks and rumors suggest his inclusion. I think it would be a smart move to include him as a way to reboot the series (something that was said that the Ice Climbers would do but didn`t in the end). So, if a Classical character is to be included, I would say Prince Sable has the best bet.

Newcomer: Little Mac


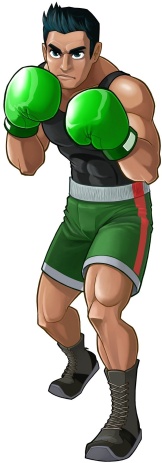
Little Mac from Super Punch-Out Wii.

Name: Little Mac

Universe: Punch-Out!!

Debut: Punch-Out!!

Element Alignment: Water

Affinity: Good

Reasons for Fighting: The Title

Availability: Starter

Little Mac is a rookie boxer looking to move up the ranks and fight in the championships. Alongside his coach, Jerome “Doc” Louise, Little Mac fights against stronger opponents and, with his trademark Star Uppercut, advances through each round. Visually, Little Mac is from his Wii Punch-Out!! form. He sports a cell-shaded look and much younger than his SSBB appearance. Little Mac brings his Star Uppercut and his boxing gloves to SSB4.


Little Mac’s Stats

Power: *****
Weight: **
Defense: ***
Speed: ****
Jump: ***
Recovery: ***
Element: *

Little Mac emphasizes in power and speed. His punches hit hard and fast and can even stun opponents if hit hard enough. Little Mac’s strengths lie in his power and speed however, his jump and defense is average. Little Mac suffers from a predictable recovery move and isn’t very heavy thus easier to juggle. However, his smaller size (Mario’s height), makes him harder to hit. Little Mac is very weak in his Water element. This is due to most of his attacks not being Water based or have Water styled attacks (like Squirtle). However, he is smooth, flowing, and confident in his abilities.

One of Little Mac’s uniqueness is the ability to shift between two types of


Little Mac Special B Move Set

Neutral B – One, Two, Three

Side B – Rushing King

Up B – Star Uppercut

Down B – Stance Change

Neutral B – Body Block

Side B – Aggressive Block

Up B – Head Block

Down B – Stance Change

The Final Trio

Final Smash – Super Rapid Punch

Final Melee: Giga Mac

Final Brawl: Knockout Punch


Descriptions

One, Two, Three is Little Mac’s Neutral B move. It is a three part combo move. Pressing B will cause Little Mac to do a right hook. Pressing B again will cause Little Mac to step forward slightly and jab with his left hand. Finally, pressing B again will cause Little Mac to dash forward quickly and do a half uppercut. The first attack does 8% damage, the second attack does 10% damage, and the final attack does 9% damage. Overall, it does 27% damage. Can be uses in mid-air but doesn’t travel as far.

Rushing King is Little Mac’s Side B attack. Little Mac dashes forward and does a straight right jab. Can meteor smash if sweetspotted. It can be charged which will affect the length of the attack. It does 15% regular, 24% sweetspotted.

Star Uppercut is Little Mac’s Up B move and his recovery move. Little Mac uppercuts hard as he sails through the air. He moves slightly forward while in the air. It has above average knockback and does 18% damage.

Stance Change: Offensive/Defensive is Little Mac’s Down B move. Little Mac shifts his fighting style from offensive to defensive. During this, Little Mac’s stats change as well as his moves. All block moves have Super Armor and negate knock back UNLESS down in the air.

Defensive Stats

Power: ***
Weight: ***
Defense: *****
Speed: ***
Jump: **
Recovery: *
Element: *

Body Block is Little Mac’s Neutral B move. Little Mac Brings his gloves close to him. Any attacks to his chest are lowered by 8-14%.

Aggressive Block is Little Mac’s Side B move. Little Mac raises his arms slightly. This technique can protect against more powerful attacks and cut them in half but it has a much more shorter duration.

Head Block is Little Mac’s Up B move. This technique is actually not a recovery move. Little Mac raises his arms to block his face and head. Any attacks to his head are reduced by 10%. It has the largest duration.

Super Rapid Punch is Little Mac’s Final Smash. Little Mac releases a torrent of rapid fast punches that travel along the stage. It is similar to the Mario Finale but it has a much longer reach. It does 68-72% damage.

  • Beginning Cinematic: Little Mac pounds his fists together and then does a muscle flex.

Giga Mac is Little Mac’s Final Melee.. Little Mac transforms into Giga Mac. While Giga Max is much slower, he is extremely strong and all of his attacks receive a 40% boost in attack damage. He can KO as low as 45%. The duration lasts 15 seconds.

  • Beginning Cinematic: Little Mac punches his boxing gloves together and suddenly beefs up to a humongous size. He crashes down and sends a shock wave everywhere.

Knockout Punch is Little Mac’s Final Brawl. Little Mac starts running in place and then jumps forward. He brings his fist back and then slams it forward into the opponent. The attack impacts bends reality momentarily and time freezes. It then rockets the opponent faraway and hits the ground. Little Mac raises his hand in triumph.


Home Stage: The Ring

Proposed Taunts

  • Up – Little Mac pounds his fists together and grunts.
  • Right Side – Little Mac jogs in place while punching in the air slightly.
  • Left Side – Little Mac does three sets of squats.
  • Down – Little Mac rotates his arm twice and holds it with the glove.

Winning Poses

  • Little Mac holds up his hands and smiles like he’s won a championship.
  • Little Mac starts jogging in place while punching. It is much like his right side taunt. He then ends with a dramatic uppercut.
  • Little Mac sits on a stool with a towel around his shoulders. He is bending forward as if tired.

Stage Entrance

  • Boxer Ring ropes appear and Little Mac enters by stepping through the ropes. He punches his gloves together.

Fighting Poses

  • Offensive: Little Mac moves back and forth with his gloves held slightly in front.
  • Defensive: Little Mac is less active and stays still mostly. He keeps his gloves by his face.

Idle Poses

  • Little Mac changes his shuffling.
  • Little Mac jumps up and down as if warming up.

Audience Chant

  • LITTLE MAC! LITTLE MAC!! GO! GO!

Kirby Hat

  • Little mac’s hair and boxing gloves.

Little Mac Palette Swap

DLC Costumes

Fat Little Mac from Captain Rainbow

Name: Fat Little Mac (from Captain Rainbow)

Name: Super Punch Out!! Little Mac (from Super Punch Out!!)


Little Mac Move Set
-Offensive-

Ground Attacks

Normal
  • Neutral Attack – Punches three times after pressing A as a combo, each dealing 3% damage each. If held down on the last punch, Little Mac does a rapid punch attack that does 1% damage each hit.
  • Dash Attack – Delivers a dashing uppercut. Does average knock back and 14% damage. Can KO as low as 100%. Quick start up but slow ending lag.
  • Strong Side – Right hook. Delivers a powerful right handed hook. Does 12% damage but does below-average knock back.
  • Strong Up – Little Mac swipes his fist over him. Has a wide range of attack and does fairly good knock back. However, it has lower priority and slow start up/ending lag.
  • Strong Down – Does a leg-aimed jab. Can cause the opponent to trip. Does 8% damage and very low knock back. It’s only usefulness is to trio opponents. It is fairly quick though and has nice reach.
Smash
  • Forward Smash – Rears back and delivers a powerful punish attack. Little Mac slightly propels himself forward while punching but barely. It can do between 23-26% damage and has very good diagonal knock back. It has a slow start up but no ending lag. It has very good priority against attacks and excellent reach.
  • Up Smash – Does a spinning uppercut. Very quick attack but it has a slow ending lag that can be punished. It does between 18-23% damage but can be sweetspotted at the top of the glove for 23-28% damage. It deals very high vertical knock back and can be used to intercept falling enemies.
  • Down Smash – A crouching spinning lariat. Little Mac stretches out his arms and spins on his foot while crocuhing. Can hit three times and deals the most amount of knock back at the last hit. It deals about 26-28% damage. It has horrible ending lag but it is a quick attack that can guard against other attacks due to it’s high priority. The first two attacks do virtually no knock back thus allowing to combo characters.
Other
  • Ledge attack – Jumps up and slams his fist down. Does 7% damage and is pretty quick.
  • 100% Ledge attack – climbs up the stage and does a forward powerful punch. It does 10% damage and decent/average knock back.
  • Floor attack – Does a very quick low jab. Does 5% damage and below-average knockback.

Aerial Attacks

  • Neutral Aerial – Does a left handed punch that is slightly angled downwards. Does 12% damage. However, it does below-average knock back and has slow landing lag. However, it is a quick attack and can be comboned in later.
  • Forward Aerial – A straight forward jab followed by a smaller, quicker jab. Does 13% damage first hit, 3% damage the second hit. However, the second hit deals more knock back and than the first but only if the two connect. It has average knock back and has zero start up/landing lag thus making it one of Mac’s better aerials.
  • Back Aerial – A powerful backhand. Deals low knock back but does 16% worth of damage and makes it his most powerful aerial. It has slow start up though but little landing lag. I has lower priority than his other aerials though and shorter reach since Little Mac has to turn around. Overall, a powerful but slow/clumsy move.
  • Up Aerial – Spins upwards with his fists stretched out. Much like his down smash attack. It deals 15% damage if all three hits and does the amount of knock back at the end of the last hit. In fact, if sweetspotted in the last hit, it does 18% damage instead and much higher knock back. However, it is slow and a bad landing lag.
  • Down Aerial – Little Mac brings his legs up and punches both fists downwards. It can be a meteor smash if sweetspotted. It does 13% damage normally and 16% damage if sweetspotted. It can be short hopped since it is a fairly quick move. It has high priority.

Grabs & Throws

  • Pummel – Knocks the opponent with a punch in the head. Does 3% and is a slower pummel.
  • Forward Throw – Lets go of the opponent and then brings a powerful two hand smash down on the opponent and knocks them into the ground. Can Star KO/Meteor Smash if near a edge. It does 9% damage and his most powerful throw.
  • Back Throw – Throws the opponent backwards by slaming them on the ground. Does 6% damage and deals average knock back. It has a thrown chain grab at earlier percentages but high knock back tends to stop it at higher percentages.
  • Up Throw – Hoists the opponent on his fist and then launches them from his fist. It actually does two hits, first hit does 2% and the next hit does 5% damage. This is because Little Mac punches the opponent and sends the player into the air. High vertical knock back but a very slow throw.
  • Down Throw – Knocks the opponent down and punches them in the gut. It does 7% damage and it can stun a player momentarily. It is very quick but deals no knock back.

-Defensive-

Ground Attacks

Normal
  • Neutral Attack – Delivers a short jab and then a second short jab. It A is pressed again, Little Mac rushes forward and punches the opponent at very close range. It does 2% damage each hit.
  • Dash Attack – Does a straight forward punch but, right after the attack, Little Mac springs slightly back. This allows him to avoid any attacks afterward. It deals 6% damage.
  • Strong Side – A lower gut aimed attack. It can stun players momentarily. It is a slower but more powerful attack and deals above-average knock back. It does 12% damage,
  • Strong Up – Brings his arms above him and makes a X shape. It can block many high priority attacks in the middle of its animation. Attacks such as Link’s Dair, Yoshi Bomb, and Zero Suit Samus’s Dair can be blocked but larger/heavier opponents such as Donkey Kong, Bowser, and Bowser Jr. can bypass this block. However, damaged is reduced by 15%.
  • Strong Down – Does a short uppercut. Little Mac keeps his punches close to him and creates less space between his body and the punch. It does 13% damage and deals average vertical knock back. It has quick start up/ending lag.
Smash
  • Forward Smash – Little Mac performs a powerful gut punch followed by a straight forward punch. It deals 8% during the first hit and 9% on the second hit. Altogether it does 17-20% damage. It has no ending lag but his punches are slower and can be punished after the second attack.
  • Up Smash – Jumps up sightly diagonally and jabs his opponent with both fists. However, due to the proximity of his fists to his body, it appears he’s ramming the opponent with his shoulder. It propels Little Mac forward slightly and he has Super Armor during the dash upward. It does 20-23% damage.
  • Down Smash – Little Mac does a wide-hitting uppercut. At the end of the attack, Little Mac is no longer crouching. It does high vertical knock back and does 19-21% damage. It is a slower attack but it has high priority and disjointed hitbixes.
Other
  • Ledge attack – Little Mac pulls himself up and does a close forward punch. It has little reach and only does 4% damage.
  • 100% Ledge – Climbs onto the stage and then quickly dodges behind the opponent thus putting them next to the ledge. Little Mac thrn does a high knockback attack that does 12% damage. One of the best 100% Ledge attacks due to putting the opponent between him and the ledge.
  • Floor attack – Does a short jab. Very fast. Does 2% damage.

Aerial Attacks

  • Neutral Aerial – Little Mac performs a X shaped guard at his chest. It can protect himself against most attacks but, if a sweetspotted Zelda Fair or Donkey Kong’s Fair connects, it will shatter the guard and cause Little Mac to fall in a helpless state. It’s at its strongest during the middle of the move.
  • Forward Aerial – A strong diagonally upward punch. It does 13% damage and knocks the opponent upwards. It has average knockback but suffers from landing lag.
  • Back Aerial – Little Mac turns and punches. It has longer range than most of his Defensive Stance attacks but it has poor startup and can’t be short hopped. It does 15% damage and does horizontal knock back.
  • Up Aerial – Basically a aerial version of the offensive Strong Up attack. It has shorter range than the Strong Up and, if short hopped, creates landing lag. Little Mac has Super Armor during this point.
  • Down Aerial – Does downward X shaped guard. It causes Little Mac to fall downward faster than regular falling speed. However, it protects up upward attacks such as Up Smash attacks. It can protect Little Mac from all uncharged Up Smash attacks but fully charged or powerful Up Specials can shatter his guard and cause him to freefall. He has Super Armor during the middle of the attack. Has bad landing lag if he misses and hits the ground.

Grabs & Throws

  • Pummel – Bops the opponent in the head. Weak but slow pummel. Does 2% damage.
  • Forward Throw – Pushes the opponent with a powerful push. Does 5% damage and downward knock back. A very quick throw that can be possibly chain grabbed.
  • Back Throw – Turns around and tosses to opponent with a swing. Does 8% damage and horizontal knockback.
  • Up Throw – Holds the opponent and uppercuts them. Little Mac’s most powerful Defensive Stance throw. Dies 12% damage and high vertical knock back.
  • Down Throw – Takes the opponent, holds him or her over his head, and slams them to the grouund. Spikes the opponent upwards after. Does 6% damage but is a slower throw.

My Thoughts

I wanted Little Mac to be different from a regular boxer. A lot of move sets I see with Little Mac just involve punching. However, I wanted to add more variety into his moveset hence why I added a option to change from an offensive to defensive stance during a fight. It allows Little Mac to be very versatile and unpredictable in fighting against him. It also allows Little Mac players to tailor Little Mac to their fighting style. In this way, Little Mac has become a very flexible and potential fighter rather than a boring boxer.


Arguments for Little Mac

Little Mac, from what I have gathered, is a fairly popular character in terms of players wanting him in the game. I feel that Little Mac could offer much for the Punch-Out!! series and would make a unique inclusion into the roster. Here are my reasons for thinking so:

  • Little Mac is a boxer which has not be represented yet in the SSB games.
  • His series, Punch-Out!! has not been represented yet.
  • The Punch-Out!! series has a long history within Nintendo and has been around for a long time.
  • Wii Punch-Out!! was released and served as a re-boot to the series. Thus making Little Mac more relevant.
  • Fairly popular character.
  • Assist Trophy status in SSBB

Chances of Being in SSB4

55% – As of now, Little Mac is fairly relevant due to the Wii Punch-Out!! game. However, if a sequel is not released; either for the Wii or the Wii U, his chances could be slim. However, I see his unique being the next one to be expanded in SSB4. However, there are other characters from un-represented universes that have a shot at being in SSB4.

Newcomer: Palutena


Palutena could sense it.  A growing darkness that surrounded the Sky World and, by extension, the cosmos that whirled overhead.  The darkness grew around her heart and filled her with disquiet.  She looked into her mirror basin and sought to catch glimpses around the world but she saw nothing but darkness.  She couldn’t even contact her most trusted ally: Pit.  he too was surrounded in darkness.  her throne chambers grew dark, cold, and quiet as she paced back and forth and searched her mind for answers to these darkness.  She couldn’t take it anymore.  Palutena stormed out of the throne chamber and down the royal hall.  About her Centurions kneeled and saluted but she dismissed them.  She didn’t want anymore fighting but if someone was going to destroy this darkness – it would be her.  She left the palace and spread out her amazing snow-white wings and took off in a fury.  She didn’t want to fight but this darkness but be dealt with here and now.  The Centurions and angels can protect Skyworld.  Its to the mechanical island that she is going to.

Palutena from Kid Icarus: Uprising

Name: Palutena

Universe: Kid Icarus

Debut: Kid Icarus (1986)

Element Alignment: Light

Affinity: Good

Reasons for Fighting: Order

Availability: Starter

Palutena is the main goddess in Skyworld and Put’s superior. She has access to many abilities, most of them based on light and angels. She is able to conjure light-based weapons, shoot projectiles, fly, and summon beams of light. She comes to the fight unwillingly and aims to end the fighting quickly and to preserve peace.


Palutena’s Stats

Power: ****
Weight: ***
Defense: **
Speed: ***
Jump: ****
Recovery: ****
Element: *****

Palutena’s greatest strength resides in her Element. Her attacks are all ragged with Light element effects and can dominate over stronger Dark type opponents if played correctly. Palutena’s second best stat is Power but it relies solely on her Light based attacks since her element and power goes hand in hand. She has attacks that, while do as much damage, give above-average knock back.

Palutena’s jump and recovery move are also high. She is given multiple jumps like Pit but, on the down side, she must summon her wings which causes a bit of a lag. However, to compensate, the wings boost her up higher compared to the other characters that have multiple jumps.

Palutena is the tallest female as well as taller than Pit. She is about the height of Ganondorf though a lot slender and faster so she is able to evade better. However, because of her height, she is a much bigger target so some of her attacks have been given Super Armor. Additionally, because of her height, she has a much longer reach which is added to her light scepter. She has one of the longest reach in the game!


Palutena’s Special B Move Set

  • Neutral B – Summon Holy Weapon
  • Side B – Particle of Light
  • Up B – Angel Dust
  • Down B – Celestial Call

The Final Trio

  • Final Smash – Super Goddess Glambuster
  • Final Melee – Silence of Time
  • Final Brawl – Angelic Messenger

Descriptions

Summon Holy Weapon is Palutena’s Neutral Special attack. Pressing B will cause Palutena to summon a weapon entirely made of light. Palutena will then immediately attack with the weapon; depending on the type. Each weapon does different damage and speed. Pressing B again during the last animation frame will cause Palutena to move slightly forward and attack with an entirely different weapon. When this is initiated, the opponent is hit stunned to allow Palutena to summon her next weapon. She can do this up to four times.

Here is the full list of weapons Palutena can use:

  • Light Sword – The Light Sword has average speed and cuts horizontally. 8%.
  • Light Claymore – The Light Claymore has slow speed and does a over-head slash. 12%.
  • Light Mace – The Light Mace has slow speed and does a diagonal over-head slash. 10%.
  • Light Axe – The Light Axe has slow speed and does a horizontal cut. 13%
  • Light Spear – The Light Spear has average speed and does a high horizontal cut. 9%.
  • Light Lance – The Light Lance has average speed and does a stabbing attack. 11%.
  • Light Dagger – The Light Dagger has quick speed and does a quick stabbing attack. 4%.
  • Light Katana – The Light Katana has quick speed and does a quick over-head cut. 7%.

All the weapons do Light based attacks and are randomized. It is impossible to predict which one will come out when you chain them together but two of the same weapons will not appear in the full 5 hit chain. Doing the full 5 hit chain will cause Palutena to move forward slightly on the ground. It has the same effect in the air but it will cause a more downward decent and isn`t a significant help in recovering. However, doing one of the attacks will slightly de-accelerate a fall. On the 5th time while doing it in the air (non combo) will cause Palutena to go into a helpless state. She has brief Super Armor when she summons a weapon but a charged Smash attack or a stronger special can break the Super Armor.

Particles of Light is Palutena’s Special Side attack. She fires of a beam of light that varies in intensity the harder you push the analog stick to the side. The beam is fast and travels the entire screen on a small to medium level and half way in a large or huge level. Once it hits an opponent, it expels itself and explodes in light. It can be fire by pressing Side B continuously. It does a base attack of 15% Light damage with an additional 2% Light damage depending how close the opponent is to the attack launch.

Angel Dust is Palutena`s Up Special move and recovery move. Palutena disappears in a twinkle of light and, by moving where you want to go, she travels to. During this time, Palutena`s body disappears and, instead, an erratic body of light particle takes her place She is immune to attacks and it functions much like an air dodge. However, anyone who gets caught in the attack is carried away with her and receives 1% Light damage for every hit. It does very low knock back but it carries the opponents with her. At the end of the attack, Palutena slowly floats down from the air with her wings. It only lasts 5 seconds and then she enters a free fall.

Celestial Call is Palutena`s Down Special. Palutena folds her hands in prayer and a beam of light travels from the heavens to in front of her. if in the air, it shoots down to where Palutena is at. If she is hit after doing the prayer, the beam of light will still come down where it originally would fall if Palutena was still there. However, holding down B will charge up the attack and release 5 beams that hit one right after each other. It travels 4 characters bodies away from Palutena. It is a fairly power technique. Each beam does 15% Light damage and cause knock back 2 seconds after the attack initially hit. It is possible to knock back an opponent into later the beams if charged down.

Super Goddess Glambuster is Palutena’s Final Smash. Palutena summons a gigantic mega weapon. She begins charging it and fires. It is a lightning fast bright beam attack that travels the length of the stage. The first player to get hit is a OHKO while the others receive 20% Light damage. The attack is fast and lasts all of 5 seconds.

  • Beginning Cinematic: Palutena begins to pray and a magical circle appears under her. Above her, the Super Goddess Glambuster appears.

Silence of Time is Palutena’s Final Melee. Palutena pauses time and everyone is frozen in time. During this effect, sound is muffled into white noise and everything, save for Palutena, takes on a gray-scale color scheme. During the Final Melee, Palutena is able to move and attack, unlike her opponents. The opponents receive no knock back but the damage Palutena gives increases by 10%. The Final Melee itself lasts around 10 seconds.

  • Beginning Cinematic: Palutena folds her hands and begins to pray. She holds them out in out stretched arms and the world begins to be enveloped in a gray sphere.

Angelic Messenger is Palutena`s Final Brawl. Palutena`s staff begins to shine brightly.  She raises her staff and the ground under the opponents begin to shake and a light shoots up. Palutena then summons a ray of light that comes down and crashes into the opponent causes a massive explosion of holy energy. Rays of light shoot out and pierce the heavens.  It does 68-70% Light damage.


Proposed Stage – Palace in the Sky

Proposed Taunts

  • Up Palutena summons her wings and she slightly hovers, spins around while glittering, and then lands.
  • Right Side – Palutena folds her hands on her chest and arches her back as if praying. A light shines around her momentarily.
  • Left Side – Palutena summons a mirror and it hovers in front of her face. She tilts her head both ways and flips up her long locks of hair and fusses with it. The mirror then vanishes.
  • Down – Palutena turns to the camera, nods her head to the side, and giggles slightly.

Proposed Winning Poses

  • Palutena summons her Throne Chair and she floats and sits in it. However, she takes a relaxed pose and spreads across the chair while yawning.
  • Palutena holds out her staff out and a beam of light erupts and shines down on her.
  • Palutena summons a rotating ball of light which drifts to the top. It starts to rotate and she does a funny (but cute) dance to it.

Proposed Stage Entrance

  • Palutena arrives within an extremely fast light beam. he is sitting in a throne chair. She gets up and the throne chair vanishes in a light beam and travels into the top of the screen.

Proposed Idle Poses

  • Palutena yawns quickly.
  • Palutena shifts the staff in her hands and restlessly flaps her shield arm.

Proposed Fighting Stance

  • She stands straight up, her scepter is held up right, and her shield arm is raised in defiance to the enemies.

Audience Cheer

  • PALU, TENA! PALU, TENA! (Girl/Guy cheer)

Kirby Hat

  • Her long, green hair and Goddess crown and forehead jewelry.]

Proposed Palette Swaps

Palutena Palette Swaps

Blue Palutena
Yellow Palutena
White Palutena
Red Palutena
Purple Palutena

Proposed DLC Costumes

Viridi Costume (from Kid Icarus: Uprising)

  • Attributes: Palutena`s element alignment changes to Earth. 5% defense increase, 4% ground attack increase, 5% ground attack speed increase, 3% jump decrease, 6% flight time decrease, 2% aerial attack decrease, and 1.5% falling speed increase.  As well, due to her costume, she has a shorter reach and is harder to hit compared to Palutena.

Amazon Pandora Costume (from Kid Icarus: Uprising)

  • Attributes: Palutena`s element changes to Water. 8% speed increase, 3% rolling speed increase, 2% defense increase, 10% attack decrease, 5% jump decrease, and 2% specials attack decrease.

Palutena`s Move Set

Ground Attacks

Normal
  • Neutral Attack – Swipes once with her staff. 3% Light damage. he then blasts the opponent for average knock back but low damage at 2% Light damage. Does 5% Light damage altogether.
  • Dash Attack – Thrusts her staff forward. Does 12% Light damage and does below-average knock back. However, very long reach and distancing technique.
  • Strong Side – Thrusts the staff into the ground and a wave of light erupts diagonally up from the ground and hits the opponent. Does vertical knock back. Little ending lag. Does 15% Light damage.
  • Strong Up – Slams her shield upwards. Very long ending lag but short cooldown. Kind of an uppercut with the shield. Does 12% damage.
  • Strong Down – Does a Light Sword summon and along the ground in front of her. Somewhat long start-up but a quick attack. Does 15% Light damage, vertical knock back, and the highest amount of knock back for any attack.
Smash
  • Side Smash – Takes her staff and holds it behind her while charging. She then swings it forward with a stream of light energy that flashes out in front of her. Has a very wide hit box. Does high diagonal knock back. Does between 23-26% Light damage and is one of her stronger smash attacks. The moment she swings the staff she receives Super Armor.
  • Up Smash – Summons a Light Spear ad thrusts it upwards. It has very a very long reach and can sweetspot at the end of the spear. Sourspotted does 8-12% Light Damage while sweetspotting does 20-23% Light damage. It does high vertical knock back.
  • Down Smash – Palutena slams the butt of her staff onto the ground and a barrier of light shoots up and knocks the opponent upwards or diagonal; depending on the location of the opponent. It can also counter and dispel weaker projectiles such as a uncharged Charged Shot, Sacred Bow, or a ray gun attack. It has high vertical knock back and can used to keep pressure off Palutena. Does 16-21% Light damage.
Other
  • Ledge Attack – Pulls herself up quickly and repels the opponent with a blast of light. Does 7% Light damage. Quick but a little ending lag.
  • 100% Ledge Attack – Pulls herself up slowly and kicks the opponent. Does 9% damage.
  • Floor Attack – Slams the butt if her staff on the ground and light shoots up. Does 6% Light damage.

Aerial Attacks

  • Neutral Aerial – Spins around while shooting out blasts of light. Hits 5 times with 2% Light damage each hit. Excellent short hop technique. No landing lag.
  • Forward Aerial – Swipes her staff from up to down. Causes a trail of light that can damage opponents after the staff has passed. Can stop weaker projectiles. Does 18% Light damage.
  • Back Aerial – Palutena kicks behind her. Little knock back and does weak damage at 10%.
  • Up Aerial – Thrusts her staff upwards. Much like Link’s Uair but much longer reach. Does 16% Light damage with 2% more when sweetspotted at the end of the staff.
  • Down Aerial – Slams her staff down and rapidly descends much like Link’s Dair. Does 17% Light damage. Good when coming out of the Up move.
  • Glide Attack – Thrusts her staff in front of her and blasts with light energy. Does 13% Light damage. Has high knock back.

Grabs and Throws

  • Pummel – Shocks them with Light damage. Does 3% Light damage.
  • Forward Throw – Blasts the opponent in a wave of light. Does 12% Light damage. High knock back.
  • Back Throw – Swings the opponent in a circle and attacks them with Light damage.  Does 8% Light damage.
  • Up Throw – Slams the head of the staff into the opponent.  Does 10% damage and high vertical knock back..
  • Down Throw – Slams opponent on the ground and slams the butt of the staff into the opponent.  Does 6% damage and is her weakest throw.

My Thoughts

At first, I was pretty skeptical about adding Palutena into my SSB4 roster since she didn`t seem too much like a fighter.  However, the more I thought about it, the more interesting she became to me. So I sat down, as I usually do, to flesh out her character by writing out her move set, stats, and special move set.  What came out was a very complex and interesting character that specialized in mid-far range attacks, projectiles, and with excellent recovery actions.  I then decided to axe Krystal in favor of Palutena.  I understand that might make some people mad but I will explain my reasoning for doing so.


Arguements for Palutena

  1. She is a female magical staff user.  Adds variety into the SSB roster.
  2. She is from Kid Icarus.  You might ask yourself why Kid Icarus deserves two reps.  Well, here are my reasons for thinking why there will be two reps for Kid Icarus: Sakurai made Kid Icarus: Uprising.  If you haven`t noticed, Sakurai loves his creations.  Kirby has been in SSB since its creation and while Meta Knight and Dedede weren`t in SSBM, they both made it into SSBB.  Metaknight is considered S tier and God-like and King Dedede is also a very powerful character.  As well, Knuckle Joe is an Assist Trophy.  Not to mention that four items from Kirby (Warp Star, Star Rod, Maxim Tomato, Super Spicy Curry, and the Dragoon are from the Kirby universe.  Not to mention that the Dragoon is a powerful and rare weapon.  And if that wasn`t enough, the Helberd was an essential portion of the storyline in Brawl and made many on-screen appearances.  So, essentially, Sakurai likes to see his creations in the SSB games.  That is why my reasoning is that we will see many aspects of Kid Icarus comes into SSB.
  3. Kid Icarus is a classical series brought back and rebooted successfully.
  4. Palutena is another gliding character and adds to the aerial game.
  5. She has good plot line material.
  6. Important and iconic character within the Kid Icarus and even Nintendo.
  7. Relevant due her playing an important part in Kid Icarus: Uprising.

Chances of being in SSB4

55% – Despite the reasons I gave, it`s still 50/50 with slightly in Palutena`s favor that she will make an appearance in SSB4.  It all depends how much influence Sakurai has in the game.  However, I can see he become an important and playable character.

Newcomer: Dark Samus


Dark Samus looked out into the desolate space. The galaxy was in chaos and it put a smile on her face. Even now, the darkness was seeping forth and swallowing stars one by one. Dark Samus took one last look and turned to leave the observation deck. She went down a dimly lit corridor and walked into a high vaulted ceiling with wavering blue lights and voices that echoed upon the high ceiling. Dark Samus immediately went to the mechanical throne and knelt. From the high throne, steam and smoke spewed out. A withered, mechanical hand stretched out and pointed. Dark Samus nodded curtly and strode forth from the throne room. She took a cage elevator to the bottom floor. She exited the elevator and in the middle was a steel ring that was three times the size of a normal human. In the middle if the ring was a shifting and swirling purple mass. Dark Samus went into the ring and through the purple mass. When she exited, she found herself falling. She stabilized herself and saw castles, forests, and towns dotting the landscape. Behind her, she saw the floating mechanical island disappear from view.

Dark Samus from Metroid Prime 3: Corruption

Name: Dark Samus

Universe: Metroid

Debut: Metroid Prime 2: Echoes (2004)

Element Alignment: Dark

Affinity: Bad

Reasons for Fighting: Corruption

Availability; Starter

Dark Samus is the evil Phazon created image of Samus. She is quite the phenomenon and constantly tries to spread Phazon and hinder Samus where ever she goes. While cold and calculating at times, she is prone to bouts of insanity and dementia when she lacks Phazon. Dark Samus comes to Super Smash Bros. 4 with a unique play style, move set, and a interesting story mode section.


Dark Samus’ Stats

Power: ***
Weight: **
Defense: *
Speed: ***
Jump: ****
Recovery: ****
Element: *****

Dark Samus is much lighter and faster compared to Samus but she lacks the fire power of the original. However, she is extremely strong in her Dark element and many of her attacks utilize Dark damage. She has a higher jump than Samus and has an amazing recovery move to boot. She can also use her tether grab to grab onto ledges and enemies. She has a shorter reach than Samus but she’s faster with lesser start and ending lags.


Samus’ Special B Move Set

  • B – Phazon Cannon
  • Side B – Phazon Spreader
  • Up B – Phazon Boost
  • Down B – Dark Echo

Final Trio

  • Final Smash – Dark Laser
  • Final Melee – Aurora Unit
  • Final Brawl – Phazon Pillar

Descriptions

Phazon Cannon is Dark Samus’ Neutral B attack. Pressing B once will result in three separate Phazon energy shots to travel across the stage. They last around 6 seconds and deals 2% Dark damage for each energy ball. It does 6% damage if hit fully. It can be fired repeatedly by hitting B. Holding down B while cause a Phazon laser to shoot out. It usually takes 6 seconds to charge. Once fired, the beam will shoot out but will end when it reaches a certain length. It lasts around 8 seconds and Dark Samus cannot move during this period. The Phazon laser does 3% every hit and can do up to 10 hits. In total it does 30% Dark damage.

Phazon Spreader is Dark Samus’ Side B move. Dark Samus fires a spray of freezing Phazon that acts like a shot gun buck shot. It fires 6 projectiles that hits for 2% Dark damage Getting hit by the attack does 12% Dark damage. Each projectile has a 10% chance of freezing a opponent. Getting hit by all six projectiles increases it to 60%. It will cause an opponent to fall to the ground if frozen.

Phazon Boost is Dark Samus’ recovery move and Up B move. Dark Samus propels herself up by using Phazon. Holding B will cause her to continue to soar higher. She can stay in the air for a total of 10 seconds if the player holds down B without stopping. The propulsion is slower though so she is somewhat vulnerable to camping.

Dark Echo is Dark Samus’ Down B move. Dark Samus flips backwards and a Dark Echo dashes out. A Dark Echo, physically, is the same as Samus but it’s speed and strength has been nerfed. In fact, is strength does out a 3rd of the original damage. So a basic attack only does 1-3% damage. The Dark Echo will run, jump, and attack other characters. However, if it gets hit with enough damage, it will vanish. Being hit 1 to 4 times with a basic attack or once with a powerful attack will cause it to vanish. It lasts for 15 seconds before it vanishes. If it is destroyed or vanishes, it releases a powerful Phazon blast that does 12% Dark damage and high knock back. If Dark Samus presses Down B again to summon a Dark Echo while another Dark Echo is on the screen, it will vanish immediately with no explosion and the new Dark Echo will dash out. Two Dark Echoes can’t be in play at the same time.

Dark Laser is Dark Samus’ Final Smash. Dark Samus hovers to the center of the stage and holds out her hands and holds them in front of her face. Inside the space between her hands comes a dark ball. It then explodes, sending dark element lasers every where. One hit does 30% damage and little knock back. However, after 8 seconds, the final lasers do very high knock back and can OHKO at low levels.

Beginning Cinematic: Dark Samus begins to overflow with Phazon to the point it looks like electricity. She than boosts from the ground.

Aurora Unit is Dark Samus’ Final Melee. Dark Samus’ merges with the Aurora Unit and becomes a giant mechanical being comprised of dark matter and Phazon. Dark Samus/Aurora Unit sits behind the stage and attacks that way.

– Pressing A will fire a single eye laser that does 25% Dark damage in the middle of the stage.
– Up Tilt fires a single eye laser that does 28% Dark damage that comes from the top to the bottom of the screen.
– Left or Right Tilt fires a single eye laser that does 23% Dark damage that comes from the left or right if the screen.
– Down Tilt fires a single eye laser that does 25% Dark damage that comes from the bottom to the top of the screen.
– Pressing B will cause the eye to grow red and a short laser burst will fire. It has a high radius and high knock back. It does between 26-30% Dark damage.
– Pressing Down B will cause a Dark Echo to appear and run around. Hitting it will cause it to vanish.
– Pressing Grab will cause Dark Samus/Aurora Unit to grab the opponent and shock it with Phazon. It does 45% Dark damage.

Aurora Unit lasts for 13 seconds before it vanishes.

Beginning Cinematic: Dark Samus clenches her fist and Phazon begins to flow from it. She fires it into the sky like a beacon and, from behind her, the Aurora Unit emerges. She jumps up to it and merges herself into it’s red laser eye.

Phazon Pillar is Dark Samus’ Final Brawl. Dark Samus presses her hand onto the ground and a frozen Phazon pillar shoots up around the opponent. It grows higher and higher until it reaches the heavens. Dark Samus walls up to the frozen pillar casually and presses her hand softly on the pillar. The pillar shatters and crashes down. The attack does 65-68% Ice damage.


Proposed Stage – Phaaze

Proposed Taunts

  • Up – She stretches her hands up and laughs cruelly. Looks much like her picture.
  • Left Side – She opens her fist and Phazon begins pulsating in it. She clenches it and extinguishes it.
  • Right Side – A Dark Echo appears and they do a fist bump. The Dark Echo then disappears.
  • Down Side – Dark Samus activates her Phazon Booster and hovers slightly. She laughs cruelly and she then lands.

Proposed Winning Poses

  • Dark Samus descends from the top of the screen with the Phazon Boosters. She then lands and erupts with a flash of Phazon.
  • Dark Samus clenches her fist and opens it up. Phazon erupts up and she thrusts it into the air. Phazon bursts forth and into the air. It highly resembles her Up Smash move.
  • Dark Samus flips to the side and lands. Right before she begins to flip, a Dark Echo flips out from next to her. They land and stare menacingly into the camera.
  • Dark punches her hand forward and then her arm cannon. She then arches her back and releases a sudden storm of Phazon from her hands.

Proposed Stage Entrance

  • A hole that glows with a blue energy forms from the ground. Dark Samus shoots out while encased in frozen Phazon. It shatters and she steps out while overflowing with Phazon.

Proposed Idle Poses

  • She clenches her hand and then opens it up.
  • Phazon energy will at time surge around her body like electricity.

Fighting Stance

  • Arches her back slightly and keeps her hands slightly out stretched at her sides.

Audience Cheer

  • DARK SAMUS! DARK SAMUS! (low female only cheer)

Kirby Hat

  • Basically the same as Samus but only Dark Samu’s helmet.

Proposed Palette Swap

  • Blue – Based off Samus’ Fusion Suit
  • Pink – Based off the Varia Suit from the original Metroid.
  • Brown – Based off the Dark Suit from Metroid Prime 2.
  • Purple – Based off from the Gravity Suit.
  • Green – Based off from the Power Suit from Super Metroid.
  • Grey

Proposed DLC Costumes

Kanden Costume

  • Attributes: Element changes to Lightning, 10% strength increase, 10% speed increase, 15% shield decrease, 5% jump decrease, and 8% Phazon Booster decrease.

Rundas Costume

  • Attributes: Dark Samus’ element changes to Ice, 5% Ice projectile damage increase, 8% jump increase, 5% shield decrease, and 3% speed decrease.

Proposed Dark Samus Move Set

Ground Attacks

Normal
  • Dash Attack – Arm cannon thrust. 9% damage. A quick and far reaching attack that does decent knock back. Fairly fast and no lag at the end.
  • Neutral Attack – Punches first and then punches with her arm cannon. First hit does 3% while the second does 7% damage. The last hit is slower and is a bit delayed after the first punch is thrown.
  • Forward Tilt – Short-hop kick. Dark Samus slightly jumps and does a spinning kick in the air. Does 5-8% damage depending on the distance. Has high knock back and can defeat enemies at percentages 100% and higher.
  • Up Tilt – Elbows upwards. Very fast and quick. Does 6% damage with moderate knock back. very hard to KO; even at higher percentages.
  • Down Tilt – Crouches and performs a 360 leg sweep. Does 7-9% damage dpeneding on the length. It has decent knock back but it has a long reach.
Smash
  • Forward Smash – Engulfs her hand in Phazon and punches forward with it. Oppnents ar ehit with Dark damage because of the Phazon. It does between 10-13% Dark damage and has moderate knock back. It can OHKO opponents as low as 70%. It is fairly quick but a slow ending lag that may leave Dark Samus helpess. However, it has a very long reach and a very small blast radius because of the Phazon.
  • Up Smash – Engulfs her hand in Phazon and then thrusts it above her head. The Phazon leaps slightly from her hand. It has a disjointed hit box and can attack from a small length. It also has a small blast radius around it. It is her best killing Smash move since it does between 13-16% Dark damage. It has very high vertical knock back, a little startup lag, but no ending lag.
  • Down Smash – Several points of frozen Phazon erupts around her. It is unique since it blocks most basic attacks and projectiles for half a second. It has very high vertical and horizontal knock back. It does 9-12% Dark damage and can OHKO as low as 50%. However, it suffers from both start up and ending lags so it’s best to use to juggle or kill an opponent.

Aerial Attacks

  • Neutral Air – Spins around while activating her Phazon Booster. It deals hits four times and deals 2% each hit. In all, it deals 8% Dark damage and can meteor spike at the last frame. Extremely quick move with no start up and ending lag.
  • Forward Air – Spins forward while encasing herself in Phazon. It hits 3 times and does 4% damage for each hit. It does a total of 12% Dark damage for each hit. It is one of her best aerials because it is quick, powerful, and useful in high competitive playing.
  • Back Air – Activates her Phazon Booster and loosens a short Phazon burst that burns the opponent. Does 8% Dark damage and has one of the highest aerial knock backs in the game.
  • Up Air – Turns upside down and kicks high in the air with both feet. It has high vertical knock back but suffers from start up and ending lag; especially when Dark Samus lands on the ground right after the attack. It does 12% damage.
  • Down Air – Kicks her feet down and spins rapidly. It hits 5 times and does 2% damage each time. It totals for 10% damage for each hit. Low knock back and one of the lowest KO abilities in the game.
  • Grapple Beam – Sends grapple forward, with long range. 3% damage, 6% damage at tip.

Grabs & Throws

  • Grab – Reaches forward with Grapple Beam. While shorter then Samus, it’s faster. Much, much faster.
  • Pummel – Burns opponent with Phazon. Does 2% damage for each Phazon burn.
  • Back Throw – Tosses the opponent backwards and activates her Phazon Booster. Deals 10% Dark Damage. Her best
  • Forward Throw – Slams opponent down and chucks them with a over-head throw Does 7% damage.
  • Up Throw – Fully extends the Grapple Beam and thrusts the opponent upwards. Does 6% damage.
  • Down Throw – Throws her opponent down and slams her heel into them. Does 8% damage.

My Thoughts

Metroid is always a hard series to come up with characters for because of a lack of solid and important characters are both iconical in their universes and within Nintendo. Ridley has been one of those characters that has been wanted since Melee, yet Sakurai, time and time again, has denied Ridley that privilege. That is why I am bringing Dark Samus as a new playable character in such a major series like Metroid. However, I know a lot of people will say “Dark Samus will just be a clone!” but, with the move set I proposed, that deals away with the clone factor. As well, her move set is both unique and diverse; especially with using Dark Echoes. Players who main Dark Samus have to rely more on wits and deception rather than fire power.


Chances of being in SSB4

30% – While Dark Samus was a major antagonist in the Prime series, it is no over and along with Dark Samus. Wether she appears in a future game has yet to be revealed. However, if there is a series that deserves more than one reps (not counting Zamus), it’s Metroid. That is why I have added Dark Samus in my roster. She is a killer villain that could be de-cloned and given a very unique move set that, while fairly similar to Samus’ main fighting style, also allows for the use of Phazon based attacks.

Newcomer: Dixie Kong


The jungle was gone. What was the Kong Family Jungle was now a barren wasteland and Dixie Kong was at a lost to what to do. Both Donkey Kong and Diddy Kong were gone and she was left alone. Overhead, the wind blew violently and lightning seared the sky. Dixie Kong was braver to be scared of lightning though and with a rush, she grabbed her hat and ran out of her pink tree house. She wasn’t sure where to head first but, ahead, she found a trail of left over bananas. This must be the way to Donkey Kong and Diddy! Dixie Kong ran ahead; following each banana but she failed to see the looming mechanical floating isle that hovered in the distance.

Dixie Kong from Super Mario Sluggers

Name: Dixie Kong

Universe: Donkey Kong

Debut: Donkey Kong Country 2: Diddy Kong’s Quest

Element Alignment: Wind

Affinity: Good

Reason for Fighting: Romance

Dixie Kong is Diddy Kiong’s girlfriend and partner in Donkey Kong Country 2: Diddy Kong’s Quest. Together, they fought off King K. Rool and his Kremling minions to save Donkey Kong. He can use her hair to attack, spin the air, and lift up barrels and crates to fight against Kremlings. While not exactly fast, she is strong and a very good jumper. She starred in her third game, Donkey Kong Country 3: Dixie Kong’s Double Trouble alongside her cousin, Kiddy Kong.


Dixie Kong’s Stats

Power: **
Weight: *
Defense: **
Speed: ***
Jump: *****
Recovery: *****
Element: ****

Dixie Kong does not boast much in power, weight or defense and her speed is less then Diddy Kong but she has tremendous jumping abilities and an excellent recovery ability. Most of her moves allows her to recover to the stage in someway or the other as well with her throws. She is best spent in mid-air or on the ground using dashing type attacks. She might not be fast but her attacks have very little lag and pack a little punch to them. As well, many of her attacks allows her to combo into them. Hit fast and combo the opponents is the best strategy for Dixie Kong players.


Proposed B Move Set

  • Neutral B – Vine Lasso
  • Side B – Spinning Hair Top
  • Up B – Hair a’Copter
  • Down B – Orange Grenade

The Final Trio

  • Final Smash: Cannon Shot
  • Final Melee – Tiny Kong
  • Final Brawl – Ponytail Monster

Descriptions

Vine Lasso is Dixie’s Neutral B special move. Dixie pulls out a vine lasso and starts twirling it above her head. Simply pressing B will cause Dixie to chuck the lasso a short distance. However, holding down B and charging it will cause Dixie to throw the lasso farther. If it hits the opponent, they will become stuck in the lasso and stunned for 6 seconds, no matter how much it is charged. In the air, the stun will last 5 seconds. Moving the the control stick and pressing the attack button may quicken the time. Dixie can also use this to latch onto the side of the stage. The lasso itself does no damage but it can be set up for combos. When Kirby copies this ability, he cannot tether onto the side of the stage.

Spinning Hair Top is Dixie’s Side B special move. Dixie rushes forward while spinning in a circle for 3 rotations. Her ponytail is spread out hitting the opponent each rotation. The attack does 5% damage per hit for a total of 15% damage. It also be used as a recovery move since Dixie moves forward in the air. However, it is slower in the air and doesn’t gain that much distance but it still a decent recovery move. She can’t double jump out of it but she can wall jump if she gets near a ledge.

Hair a’Copter is Dixie’s Up B recovery special move. Dixie jumps high in the air much like Peach’s Recovery move in Super Smash Bros. Brawl. However, she begins spinning in the air and slowly falls to the stage while spinning. Each rotation does 1% damage and she does between 6-10 rotations. This is one of the of the best recovery moves in SSB4 because of it’s long range and combo ability. She goes into a helpless state if hit from the air during this unless she gets near to a wall in which she can wall jump out of it.

Orange Grenade is Dixie’s Down B special move. Dixie takes out a orange grenade and tosses it across the stage. Holding down B will change how far the orange grenade is thrown. If it will explode if it hits something on impact. The grenade lasts for 4 seconds after thrown and will explode. Holding down B doesn’t change how big or damaging the explosion is. While in the air, Dixie slightly jumps up in the air while chucking the grenade downwards. This gives her a slightly higher boost. She can then do a double jump or a recovery move. The boost in the air is very small but can help her grab onto a ledge.

Cannon Shot is Dixie’s Final Smash. A cannon barrel falls to the ground and onto Dixie Kong. It then takes aim, charges dramatically, and then fires Dixie Kong into opponents. It does 73% damage with high knock back but, the only problem is if the cannon shot misses, Dixie falls into a helpless state so it’s best to hit your opponents since this stops her movement and the fall to her death. It can also be used as a recovery move.

  • Beginning Cinematic: Dixie Kong jumps up and down and shrieks. She looks back and a Blast Barrel begins rolling along the ground.

Tiny Kong is Dixie Kong’s Final Melee. Being Tiny Kong’s older sister, Dixie also has shape changing abilities. She shrinks down to the size of a person affected by the Poison Mushroom. However, her strength increases by 15% for all her attacks. As well, the opponents that are hit are monetarily stunned for .5 seconds. The Final Melee lasts for 8 seconds but it’s enough time for her to damage her opponents. Her attacks become very fast and powerful and she retains her jumping ability. She gains 12% Super Armor at this point but, since she is so small, it is hard to hit her.

  • Beginning Cinematic: Dixie Kong begins to focus her energy. Her arms grow small, her legs, her head, and then the rest of her body.

Ponytail Monster is Dixie Kong’s Final Brawl. Dixie Kong begins to dance on one foot and glows with a strange orange energy. Her ponytail begins to grow bigger and bigger. It then shoots out and slams into the opponent. It carries the opponent high into the air and then crashes down to the ground. Bits and pieces of hair fly into the air. Dixie Kong’s ponytail returns back to normal afterward. It does 66-68% damage.


Proposed Stage: Timber’s Island

Proposed Taunts

  • Right Side – Dixie takes off her hats and flips int he air and catches it. If she is facing Diddy Kong, she blows him a kiss.
  • Left Side –
  • Up – Dixie Kong takes her pony tail and flips it in the air in a nonchalant attitude.
  • Down – Dixie Kong stands on her hands and claps with her feet twice. She then gets back to her normal pose.

Proposed Winning Poses

  • Dixie Kong jumps up and down and claps her hands each time.
  • Dixie Kong begins peeling a banana and eats it slowly.
  • Dixie Kong does a break dance on the ground. She then flips and stands on one foot while doing a Crane-looking stance.

Proposed Stage Entrance

  • Breaks out of a DK barrel and does a twirl and resumes her normal stance.

Idle Poses(s)

  • She plays with her hair.

Audience Cheer

  • DIXIE DIXIE DIXIE KONG!!! (female cheer)

Kirby Hat

  • Dixie Kong’s pink hat and yellow ponytail.

Proposed Palette Swaps

  • Blue Dixie Kong
  • Green Dixie Kong
  • Red Dixie Kong
  • Tiny Dixie Kong

Proposed Buy-Able Costumes

Tiny Kong Costume (from Super Mario Sluggers)

  • Attributes: 5% weight increase, 3% jump increase, 3% speed increase, added 3 seconds to Final Smash, 2% power decrease, 5% shield decrease.

Proposed Dixie Kong Move Set

Ground attacks

Normal
  • Neutral Attack – Dixie Kong slaps once, then twice, and then swings around and starts slapping the opponent with her ponytail. Each attack does 1% damage while the repeated ponytail attack does 1% damage each hit.
  • Dash Attack – A spinning ponytail spin. Hits the opponent once for a good knock back. Does 6% damage. Very little ending lag. It can be combo’d shortly afterward.
  • Strong Side – Round house kick. Hits once and does 9% damage with a little starting lag but little ending lag. Below-average knock back.
  • Strong Up – Claps above her, much like DK’s Up Smash. Slow start up lag but can easily be combo’d after. Does 5% damage. It does below-average horizontal knock back.
  • Strong Down- Does a grounded spinning kick. It does 5% damage one hit and 3% behind her for a total of 8% damage. Slow ending lag. It launches a opponent horizontally if hit on the side of the stage while hanging.
Smash
  • Side Smash – Spins back and slaps the opponent with her ponytail twice. Each slap does 7% damage uncharged, 9% fully charged for a total of 14% to 18% if fully charged. Decent knock back.
  • Up Smash – Swings her ponytail over her head in a wide arc. Little ending lag and has a wide range of attack and a long reach. It does 10% uncharged and 22% fully charged. High vertical knock back.
  • Down Smash – A unique attack where she punches the opponent stuns, and then stands on her hands quickly and kicks the opponent up in the air. A little lag and does 14% damage uncharged and 26% damage charged. This is her strongest smash attack.
Other
  • Ledge Attack – Launches herself up and spins in the air with her leg out. Does 6% damage. It has little knock back but it can be combo’d afterward.
  • 100% Ledge Attack – Climbs up and sweeps the opponents legs from underneath them. Does 8% damage. No ending lag.
  • Floor Attack – Gets up and spins her ponytail in a circle. Very quick. Does 4% damage and a horizontal knock back.

Aerial Attacks

  • Neutral Aerial – Spins around and stretches out her ponytail for an attack that does 6% damage. It has very little knock back but no landing lag at all.
  • Forward Aerial – Swings around and smashes her hand against the opponent. One of her stronger aerials and it does 12% damage. However, if it connects at Dixie’s shoulder or middle of the arm, it only does 10% damage. Moderate knock back ability.
  • Back Aerial – Does a drop kick and then starts spinning for a drill-like affect . A bair that has a good amount of knock back potential. It does 4% damage for each hit for a total of 14% damage. A little ending lag after finishing.
  • Up Aerial – Overhead Flip Kick. Decent knockback, fairly fast.
  • Down Aerial – Turns upside and thrusts her ponytail downwards. Quite possibly one her stronger attacks. It is a meteor smash only when the tip of her ponytail connects with the opponent. It does 10% if not a meteor smash, 15% if meteor smashed.

Grabs and Throws

  • Grab – Dixie Kong grabs with her ponytail.
  • Pummel – Squeezes the opponent with her pony tail strength. It does 3% damage each time.
  • Forward Throw – Crunches them in her hair and then chucks opponents forward. Does 7% damage with high knock back potential.
  • Back Throw – Slams them on the ground in front of her with her hair and then tosses the opponent behind her. The first slam does 6% damage and the toss does 2% damage for a total of 8% damage total.
  • Up Throw – Takes the opponent and chucks them high into the air with her hair. It does 12% damage and is her strongest throw. Good KO potential and vertical knock back.
  • Down Throw – Jumps up int he air and then slams the opponent down using her hair. It does 10% damage overall. The opponent bounces back up to Dixie allowing her to combo into the throw.

My Thoughts

At first, I wasn’t sure how Dixie Kong would be played as or if she would be good as a playable character. I thought she would be a Diddy Kong clone but, after some thinking, I thought using her pony tail and floating ability would be interesting. I started thinking around the lines if Peach was a monkey and it started from there. I really ended up liking Dixie Kong and found a new appreciation for her, not only for her DKC games but as a fighter in SSB. I think she would make a great addition.

I added Dixie Kong because I felt the DK series needed a new representative after being ignored for 2 games as well as a foil for Diddy Kong. I felt the game could create some dramatic tension with a boyfriend and girlfriend in a game.


Chances of Being in SSB4

50% – I would say Dixie Kong has a fair chance to be in SSB4. She was possibly planned for Super Smash Bros. Brawl due to found data in the game as well appearing as a trophy since Melee. She has a unique move set that be much different compared to Diddy. However, I would say she has a tough contender: King K. Rool who happens to be a villain. Those the two minorities battle each other for a spot in the roster: Dixie Kong being a female and King K. Rool being a villain.

Newcomer: Nightmare


A Tale that Transcends Time and the World. The World has grown darker and eviler and that much more enjoyable. Thunder clouds rumbled across the church ruins and Lighting seared across the sky. The Azure Knight looked up to the sky, drinking in the shadows and spotted; within the darkening vortex: a floating mechanical isle. The Azure Knight could feel the evil within and desired it; he salivated at it. He wondered what kind of soul the isle held. He accepted the evil that flew out forth from it but hid his desire: to devour it. Within the darkness of the mechanical isle, he felt such evil and fear and it nearly drove him insane from hunger. But he was promised so many souls to feed on that he wouldn’t be hungry for centuries.

Darkness lifted and the smoke encircled around him. He touched on the ground; a new ground he never felt before and looked on. He could feel all the souls and all ripe for the taking. The soul of the mechanical isle was puny compared to these Universes souls. But ahead of him were puny creatures; weak and small, unfit for fighting. Yet, they challenged him and this cause shim to laugh.

“And so the Nightmare Begins” He laughed in a mocking snicker and made forth to attack; his Soul Edge in hand.

Nightmare from Soul Calibur II

Name: Nightmare

Universe: Soulcalibur

Debut: Soulcalibur (1998)

Element Alignment: Dark

Affinity: Bad

Reason for Fighting: Hatred

Nightmare hails from the Soulcaliber series from Namco. He has played as the antagonist since the first Soulcalibur where he uses super natural powers and skilled sword fighting abilities. He wields the Soul Edge, a cursed sword that can trap people’s souls. The sword itself is parasitic and drains the life of those it kills in exchange for draining the life of the wielder. Nightmare seems to be able to handle the swords powers. Nightmare brings the hellish blade and his supernatural into SSB4 and as the games leading antagonist and devourer of the Universes Soul. He is responsible for setting the games events into motion.


Nightmare’s Stats

Power: *****
Weight: *****
Defense: ****
Speed: *
Jump: **
Recovery: **
Element: ***

Nightmares jump, speed, and recovery stats are horrid but his highest stats is his power, weight, and defense. He can take a large amount of abuse while still standing. However, he has a hard time fighting against faster enemies. In order to do enough damage on Nightmare though, the opponent has to hit quick and hard because once Nightmare’s blade connects, it will be hard to get back into the game.

However, playing as Nightmare can be fairly difficult. Nightmare wields the cursed blade, Soul Edge, which drains the wielders health in exchange for power. Likewise, the sword causes Nightmare 6 damage every 6 seconds which can cause Nightmare 60% damage every minute. That might seem like a bad idea but like Lucario, Nightmare’s physical attack increases by 5% for every 20% damage he receives after passing 150% damage. So basically, his neutral B attack, Blood Lord’s Invasion does between 20-37% damage. However, if Nightmare passes the 150% damage mark, the attack goes up 5% for every 20% damage he takes. So if Nightmare is at around 230% damage, he can deliver between 45-62% damage from his Blood Lord’s Invasion technique. This also applies to his Final Smash, Final Melee, and Final Brawl. This is where Nightmare’s true strength lies: an all-out offensive without thought of defense.


Nightmare’s Special B Moves Set

  • B – Blood Lord’s Invasion
  • Side B – Night Regnum
  • Up B – Cannonball Splitter
  • Down B – Soul Drain

The Final Trio

    • Final Smash – Dark Reconquista
    • Final Melee – Critical Edge
    • Final Brawl – Soul Stake

Descriptions

Blood Lord’s Invasion is Nightmare’s Nuetral B move. It is a chargeable move that causes Soul Edge to surround itself in dark magic and then be smashed over the opponent. If Nightmare charges it for too long, Soul Edge will drain his health adding 15% damage to Nightmare. It can be charged for 5 seconds and does between 20-37% damage to the opponent with an additional 2% damage with the right perks.. It is very similar to Ike’s Eruption attack but does more damage to Nightmare when released at it’s fully charged state.  Nightmare has Super Armor while delivering the attack.

Dark Regnum is Nightmare’s Side B move. Nightmare reels back and swings his sword in a almost 360 degrees and launching the opponent in the air. Nightmare can charge it up but charging it fully/failing to hit will cause Soul Edge to add 10% damage to Nightmare. It does between 30-40% damage. Useless in midair unless timed perfectly. It has a horrible ending lag but does a lot of damage. Extremely high vertical knockback and KO potential.  If down in Mid Air, he cannot do it again but he can double jump or do an Up Recovery move.

Cannonball Splitter is Nightmare’s Up B Recovery Move. Nightmare flips forward, brings his sword, and uses the momentum of swinging the sword down after his flip. Can do up to 4 hits. The first hit is the first flip with does 3% damage, the second hit is the sword being brought up from the back and does 5% damage, the third hit is the beginning arc of the sword slash that does 12% damage and the last hit is the sword smash down which does 18% damage. Altogether it can hit for 38% damage. A decent recovery move but has a start up and ending lag animation. Nightmare has Super Armor during the course of the attack.

Soul Drain is Nightmare’s Down B attack and one of his most useful techniques. Since Nightmare constantly racks up damage, his Down B move can cause damage to decrease by absorbing others health. However, this can only be done by holding the opponent. Nightmare grabs the opponent, much like a grab, and begins draining the opponent of health. The opponent can struggle and break free of his grip or Nightmare can be attacked. Any attack can cause Nightmare to lose his grip. He absorbs 4% damage for every second and can only absorb for 6 seconds thus absorbing 24% damage at a time. This can be very useful in duels but can be problematic in group battles since he is unguarded at this time.

Dark Reconquista is Nightmare’s Final Smash.  The eye begins sucking in energy all around him and Nightmare heaves up his massive sword, which has grown twice his size, and smashes down on his opponent with extremely high damage. It can do between 65-70% damage. It has very high knock back; both vertical and horizontal and will OHKO anyone past 10% damage save the most heaviest characters.

  • Beginning Cinematic: The eye in Soul Edge opens up and begins looking around chaotically.  Dark energies begin to wrap themselves around Nightmare and he explodes in a dark and purple aura of energy.

Critical Edge causes Nightmare’s body to begin sparkling with electricity and dark magic, much like how the Unblockable ability is in Soul Calibur. It gives Nightmare an added 6% attack damage, 6% attack damage resistance, 6% speed increase in his attacks, and 100% Super Armor. Nightmare’s damage system does not take affect here due having past 100% damage does not increase Nightmare’s attack damage percentage. As well, simply standing next to Nightmare results in 1% damage per hit due to his unholy aura. It can shatter shields within one to three hits; depending on the attack and if charged.  He can use any of his attacks besides his Final Smash and Final Brawl. If he falls of the stage and does not recovery, he can be KO’d and thus lose his Final Melee.

  • Beginning Cinematic: Nightmare takes out his monster-like hand and grips it.  He then holds it aloft and a dark aura pulsates forth.

Soul Stake is Nightmare’s Final Brawl.  Nightmare raises his fast and begins to glow with a dark purple energy.  It channels from his arm to the sword and travels to the eye.  The eye blinks open and starts to shake violently.  It starts releasing pulses of dark energy which then shoot out and creates a massive dome-like explosion.  It deals very high vertical and horizontal knock back and does 68-70% Dark damage.


Proposed Stage: Fated Encounter

Proposed Taunts

  • Left Side – He raises his hand in the air and grips it. Dark magic surrounds it as he says “The Nightmare has only just begun”
  • Right Side – He slams his sword into the ground, holds it by the hilt, and laughs menacingly.
  • Up – He raises slightly off the ground says “Soul Edge!” and throws out his hands. A purple aura shoots out and can damage nearby opponents for 1% damage,
  • Down – Nightmare stands up with his sword pointing downwards. Tira then appears out of nowhere and they both laugh at the opponents. She then disappears.

Proposed Winning Poses

  • Nightmare swings right, turns and swings left, and then faces the camera and says “Taste fear!” Similar to his winning pose in SCII.
  • Nightmare raises his claw-hand in the air and shakes it. A swirl of dark magic swells around it and he says “Hurry, give me more souls!”
  • He reels back and then heaves his sword up above his head and stops. He then says “I will show you the greatest nightmare!”

Proposed Stage Entrance

  • The eye of Soul Edge appears and from it Nightmare. A dark magic aura pours from his body.

Audience Cheer

  • NIIIIGHTMARE!!! NIIIIIIGHT!MARE! NIIIIGHTMARE!! (a male cheer in a guttural Death metal grow)

Kirby Hat

  • Nightmare’s helmet, red hair tassel, and miniature version of the claw-arm.

Idle Animation

  • Shakes his sword up and down and then resumes his fighting stance.
  • Lets go of his sword with one hand and raises it and shakes it. He then regrips the sword.

Proposed Palette Swap

  • Purple Nightmare –  Resembles Ivy‘s color scheme.
  • Flesh Nightmare – Resembles his 2P costume from SCII.
  • Red Nightmare –  Resembles Taki’s color scheme.
  • White Nightmare – . Resembles Sophita‘s color scheme.
  • Yellow Nightmare – Resembles Yoshimitsu‘s color scheme.
  • Black Nightmare – Resembles Mitsurugi‘s color scheme.

Proposed Buy-able Costume

Legends Nightmare (from Soulcalibur Legends)

  • Attributes: His damage resistance increases by 10% but his damage attack decreases by 4%, his element increases by 2%, his speed decreases by 2%, and his defense decreases by 2%.

Nightmare’s Moveset

Ground Attacks

Normal
  • Neutral attack – Quick horizontal slash. Slow ending lag. If A is hit again, he does a even quicker horizontal slash with literally no ending lag. First attack does 15%  and the second hit does 7% damage. Resembles Quick Temple Buster.
  • Dash attack – Runs forward and swings his sword upward in a almost 360 degree circle. Very high knock back at high percentages. Slow start up and ending lag. Does 22% damage. Resembles the Crimson Vortex.
  • Strong Side – Swings his sword down and smashes it into the ground casuing opponents to bounce off from the ground. High vertical knockback damage. Does 18%. Resembles the Death Smash.
  • Strong Up – Uppercuts the opponent with his claw. Does 14% damage. Resembles the Upper Claw. Quick and moderate ending lag.
  • Strong Down – Swings his sword down and cuts at the opponent at their feet. Can meteor smash hanging opponents but must be sweetspotted and hard to execute. Quick with no lag. Does 17% damage. Resembles Shadow Splitter.
Smash
  • Side Smash – Slightly dashes forward and swings his sword horizontally. A stronger version of his neutral. His sword is enveloped in dark magic. It does 18-22% damage. It has a long start up lag but a fairly quick ending animation. It has a high horizontal knock back and a far reach. Resembles Right Slasher.
  • Up Smash – Reels back and then swings the sword in a almost 360 degree circle while charged up with dark magic energy. Does between 20-28%. Resembles Ether Lord’s Carnage.
  • Down Smash – Slams his sword down into the ground with a fiery impact. Does between 19-26% damage. Can break shields fully charged but extremely slow start up lag. Resembles Soul Smasher.
Other
  • Ledge Attack – Nightmare vaults himself into the stage and stabs at the opponents feet. Does 10% damage. Has a slow ending lag. Resembles the Dark Soul Impact.
  • 100% Ledge Attack – Crawls up, plows his shoulder into the opponent, and then stomps the ground. Both attacks do 8% damage. Low knock back. Resembles the Earth Trample.
  • Floor attack – Kneels up, crouches, and head butts the opponent. Does 9% damage. Resembles the Dark Head Upper.

Aerial Attacks

  • Neutral Aerial – Kicks the opponent with his leg. Does 10% damage. Resembles the Fatal Brave Kick. Low knock back but his quickest attack.
  • Forward Aerial – Swings his sword around in front of him. Can be angled downwards. Does 15% damage. High horizontal knockback but low landing lag. Resembles Fatal Spin Slash.
  • Back Aerial – Drop kicks behind him. Can be sweetspotted. It does 18% damage, 22% damage if sweetspotted. It has a slow start up leg and hard to execute sweetspot. Resembles Drop Kick but reversed
  • Up Aerial – Flips around and swings his sword over him and down. Has a very slow ending lag. Does 18% damage. Resembles Flying Edge. Very high horizontal knockback.
  • Down Aerial – Attacks once with a upward swing and then swings down, smashing opponents to the ground. Highly successful meteor smash. The first attack usually catches the opponent in midair. First attack does 10% while the second attack does 12%. Resembles Death Horn Charge.

Grabs & Throws

  • Pummel – Slams the swords hilt. Does 3%. Fairly slow. Resembles Bloody Hilt.
  • Forward Throw – Punches the opponent and then slams his sword down on them into the ground. Does 15% damage. High knock back and KO potential. Resembles Soul Devour.
  • Back Throw – Basically the same thing but instead of punching, Nightmare throws them behind him and slams the sword down. Does 13%. Lower KO potential then the Forward Throw.
  • Up Throw – Grabs the opponent by the legs and tosses them into the air. Very low KO potential or knock back. Does 6% damage. Resembles Flap Jack.
  • Down Throw – Drives the opponent to the ground and slams his sword hilt into the opponent. Low knock back or KO potential. Does 14% damage. Resembles Witch Hunt

My Thoughts

Ok, I know I am stretching it here you must be wondering “What the hell is this guy doing?” However, let me explain why I decided to add Nightmare to my roster as well as the first 3rd Party character to be released by me.

1. I wanted a evil character. A truly evil character that can strike fear into opponents. Ganondorf, Ridley, Demise, Giga Bowser, and others seem evil but, they didn’t cut it in my opinion. I wanted some one truly evil to further the story.

2. I wanted a evil 3rd party character. I went through several characters such as Sephiroth (FF7), Yggdrasil (Tales of Symphonia), Dracula (Castlevania), Wesker (Resident Evil), Dr. Wily (Megaman), and many others but I felt none contained that fear factor that I desired.

3. I wanted a heavy sword fighter that looked bulky and acted bulky but was strong. Ike to me does not seem like a heavy sword fighter. He is but he lacks the heavy armor. The Black Knight from Fire Emblem was originally going to fill this roll.

4. Lastly, I wanted a character whose damage percentages constantly increased but you were able to decrease it with a move. I wanted a really technical fighter who could give out punishment.

Thus, I turned to Nightmare, a personal favorite of mine from the SC series. I soon began to like the idea which turned into loving the idea of such a hellish villain in a SSB game. Thus, I started to craft him into the story of being the series main antagonist and the villain who fights in place of his master or the mechanical floating isle that I have mentioned in almost every character post.

I envisioned Nightmare has a really heavy sword fighter whose attacks could cause OHKO or extremely high damage but hard to execute and connect. Additionally, I wanted him to increase in damage as he fought so that is why I added Soul Drain to allow him to steal a small amount of health back. Ideally, you would want to fight as Nightmare with high HP since he is very hard to juggle, combo on, or KO under 200% HP. That is why I added two attacks, Blood Lord’s Invasion and Dark Regnum to add damage if fully charged thus contributing to this damage theory. I was really happy how Nightmare turned out and fleshing out his details took around two days to complete. I decided to go with his SCII design since that was the first SC game for Nintendo and more easily identifiable then his SCL design.


Chances of being in SSB4

.05% – I highly doubt Nightmare will come to SSB4 in any form so this was merely a wish on my part as well as to continue my story mode idea. If any characters from Namco would make an appearance, it would be Pacman or Lloyd Irving from the Tales of Symphonia game. Both have a deeper relationship to Nintendo then Nightmare does.